Step 1: Convert The Background Layer Into A Smart Object
With my photo newly opened in Photoshop, if we look in my
Layers panel, we see the image sitting on the
Background layer which is currently the only layer in the document:
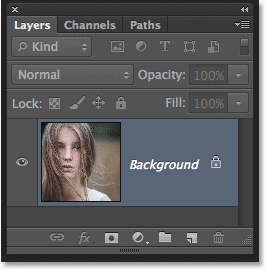
The Layers panel showing the photo on the Background layer.
Let’s convert this Background layer into a
Smart Object. Click on the small
menu icon in the top right corner of the Layers panel:
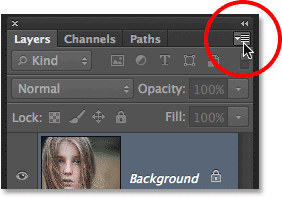
Clicking the Layers panel menu icon.
Choose
Convert to Smart Object from the menu that appears:
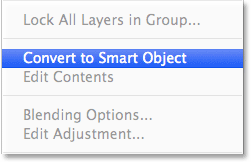
Choosing “Convert to Smart Object” from the menu.
It won’t look like anything has happened to the image, but we can now see a small
Smart Object icon in the bottom right corner of the layer’s
preview thumbnail in the Layers panel. This is Photoshop’s way of telling us the layer is now a Smart Object:
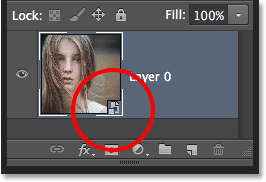
A Smart Object icon appears in the layer’s preview thumbnail.
Step 2: Apply The Motion Blur Filter
We’ll use a couple of Photoshop’s filters to create the main ghosting effect, and we’ll start with the Motion Blur filter. Go up to the
Filter menu in the Menu Bar along the top of
Photoshop’s interface, choose
Blur, then choose
Motion Blur:
Going to Filter > Blur > Motion Blur.
This opens the Motion Blur filter’s dialog box. Start by setting the
Angle for the blur to
0°. Then, increase the amount of blurring by dragging the
Distance slider along the bottom of the dialog box. The further you drag it to the right, the more motion blur will be applied. The exact amount you use will depend a lot on the size of your image. In the original version of this tutorial, I was using a fairly small photo so I set my Distance value to around 95 pixels. This time, I’m using a much larger image so to achieve the same amount of blurring, I need to set the value much higher (to around 500 pixels). The easiest thing to do is to keep an eye on your image in the document window to judge the results as you drag the slider:
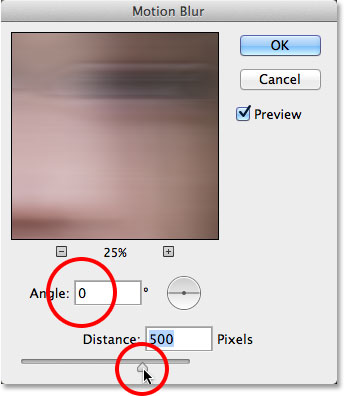
Increasing the motion blur amount by dragging the Distance slider.
Click OK when you’re done to close out of the Motion Blur dialog box. Your blur effect should look similar to this:
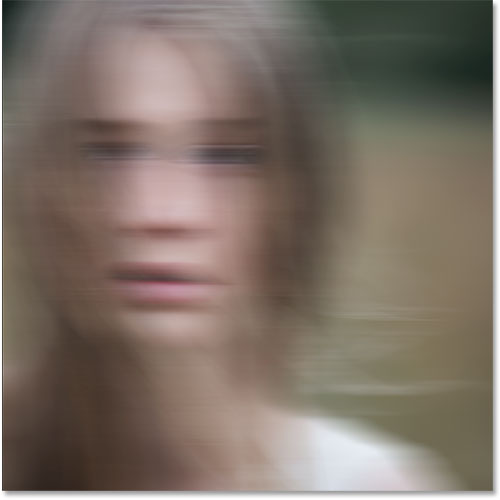
The image after applying the Motion Blur filter.
If we look again in the Layers panel, we see that because we first converted the Background layer into a Smart Object, the Motion Blur filter was added as a
Smart Filter. If you don’t think you added enough of a blurring effect, or maybe you added too much, just
double-click on the Motion Blur filter’s name below the Smart Object to re-open its dialog box and re-adjust the Distance slider. Your changes will be instantly updated in the image (click OK to close out of the dialog box again when you’re done):
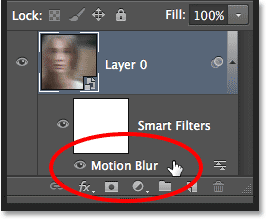
Double-click on the Motion Blur Smart Filter to change its settings if needed.
Step 3: Select The Smart Filter Mask
Click on the Smart Filter’s
mask thumbnail in the Layers panel to select the mask. A white highlight border will appear around it letting you know it’s selected:
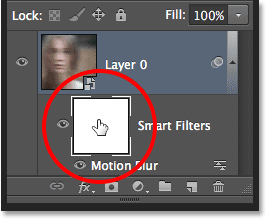
Selecting the Smart Filter mask by clicking on its thumbnail.
Step 4: Select The Brush Tool
We’re going to use the mask to bring back some of the original non-blurred areas of the image. Select Photoshop’s
Brush Tool from the Tools panel along the left of the screen (or press the letter
B on your keyboard to select the Brush Tool with the shortcut):
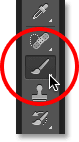
Grabbing the Brush Tool.
Step 5: Set The Brush Color To Black
We’ll need to paint on the mask with
black to reveal some of the original photo, which means we first need to set our brush color to black. Photoshop uses the current
Foreground color as the brush color, so with the mask selected in the Layers panel, press the letter
D on your keyboard. This will reset the Foreground and Background colors to their defaults, with white as the Foreground color and black as the Background color. Then, press the letter
X on your keyboard to swap them, which sets the Foreground color to black.
You can see the current Foreground and Background colors in the
color swatches near the bottom of the Tools panel. The Foreground color (upper left swatch) should now be black:
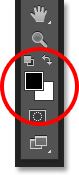
The current Foreground (upper left) and Background (lower right) colors.
Step 6: Lower The Brush Opacity To 25%
With the Brush Tool selected, go up to the
Options Bar along the top of the screen and lower the
Opacity value to
25%. This will allow us to reveal the original image gradually with each brush stroke, making it easier to fine-tune the amount of blurring in a certain area (rather than the “all or nothing” approach we’d get by painting with a brush opacity of 100%):

Lowering the brush opacity to 25% in the Options Bar.
Step 7: Select A Round, Soft-Edge Brush
Right-click (Win) /
Control-click (Mac) anywhere inside the image to open the
Brush Preset picker and choose a round, soft-edge brush from the list. I’ll choose the very first one in the top left corner by clicking on its icon. This gives us a brush with a
Hardness value of
0%, or in other words, the softest edge possible. Press
Enter (Win) /
Return (Mac) when you’re done to close out of the dialog box:
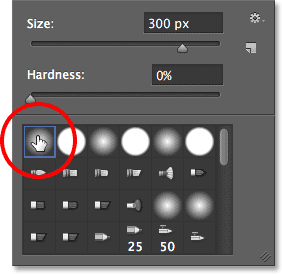
Choosing a round, soft-edge brush.
Step 8: Paint Over Areas To Reveal The Original Photo
With the Brush Tool in hand, black as your Foreground color and the brush opacity lowered to 25%, begin painting over areas where you want to reveal the original image through the motion blur effect, like the person’s eyes, nose and mouth. Each time you paint a brush stroke over the same area, you’ll reveal a bit more of the original image (make sure to release your mouse button in between brush strokes). You can adjust the size of your brush directly from your keyboard. Press the
right bracket key (
] ) repeatedly to make the brush larger or the
left bracket key (
[ ) to make it smaller. If you accidentally paint over the wrong area, or you've revealed too much of the original image in a certain area, press the letter
X on your keyboard to swap the Foreground and Background colors, which will set your Foreground color to
white. Paint over the area with white to bring back the motion blur effect, then press
X again to set your Foreground color back to black and continue painting.
Here, I've painted over the center area of the girl's face to reveal her eyes, nose and mouth through the motion blur effect, and I've also painted along some of her hair:
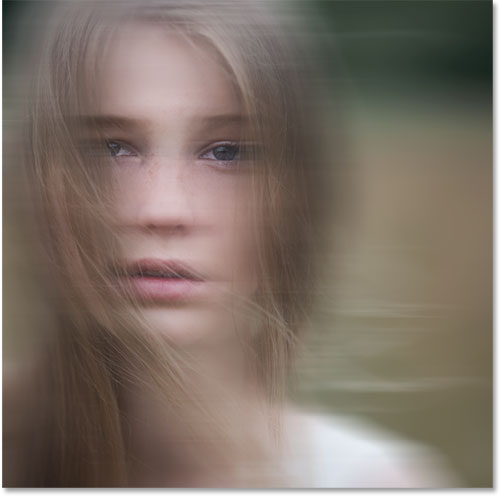
The image after painting with black on the Smart Filter mask.


.jpg)